Initiating Local Deployment: Your First Docker Container

Why Choose Docker?
One of the biggest advantages that Docker offers is the ability to make your application platform-independent by dockerizing it. Here is an easy example of a Docker container that will assist you in building your first Docker container.
Requirements
Docker Desktop
Any text editor software/code
An account on Docker Hub (optional)
Links for installation and creating a Docker Hub account
link to install docker desktop - Docker Desktop
link to create Docker Hub account - Docker Hub
Lets get started
The first step is to create a Dockerfile for your application. For example, if you have a Node.js application, you need to create a Dockerfile that will install all the dependencies necessary to launch your application. When you run this Dockerfile, an image will be created, serving as a blueprint for your container.
- Here is a basic
index.jsfile:
console.log('Hello from Docker Container!');
- 'Dockerfile' to build a image
# Use an official Node.js runtime as the base image
FROM node:14

# Set the working directory in the container
WORKDIR /usr/src/app

# Install app dependencies
RUN npm install

# Copy the rest of your application code to the container
COPY . .

# Command to run your Node.js application
CMD ["node", "index.js"]
FROM: Specifies the base image on which further instructions or tags will be executed.
WORKDIR: Sets the working directory inside our container.
COPY: Allows us to copy files from the local machine to the container.
RUN: Executes commands on top of the image specified in the FROM tag.
CMD: Executes the command once the container spins up and is running.
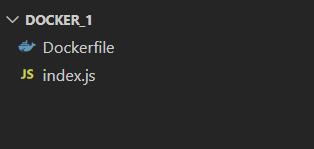
Once 'index.js' and 'Dockerfile' have been created, here is an example of the file structure:
Build an image from your Dockerfile
Build an image from your Dockerfile once all dependencies are mentioned. Ensure that Docker Desktop is up and running on your machine. Run the following command in the same directory where the Dockerfile and index.js file are stored.
docker build -t node-app .
-t : flag is used to tag the image with a name, where 'node-app' is the assigned name of the image.
. : means building the context from the current directory.
Now, verify if the image has been successfully built. Use the following command to list all the images.
docker images
After successfully building the image, run the following command to create a container.
docker run node-app
The console output "Hello from the Docker Container!" will be visible in your terminal. You can also check the status of the container using the following command.
docker ps -a
What's next?
The Docker image can be pushed to an image registry, allowing it to be reused to build a container whenever needed. Currently, various registries are available in the market, provided by different platforms such as Docker Hub, Amazon ECR, Google Container Registry, and Azure Container Registry.
To clean up created images and containers, following commands can be used.
#Delete image from local machine
docker image rm [image name]

#Stop and delete container from local machine
docker stop [container name]
docker rm [container name]
Conclusion
In this blog post, you learned how to create an image using a Dockerfile and run a basic Node.js application in a Docker container. I hope you found this blog post useful and informative.